Baked kale chips are my secret weapon when I need a snack that feels just as satisfying as potato chips but won’t make me feel sluggish afterward. There’s a weird joy in watching those rocky, curly leaves crisp up in the oven, turning a vibrant shade of emerald to a perfectly toasted, slightly smoky crunch. It’s honestly kind of meditative to toss kale with a little oil and watch it transform, a small act that turns into a whole new snack experience.
What makes this recipe special isn’t just the crunch but how adaptable it is. Sometimes I add a sprinkle of smoked paprika, sometimes just a pinch of sea salt, and every time it’s a different journey. It’s one of those simple pleasures that’s become a go-to for me—easy to make, wildly customizable, and way better than store-bought chips in both flavor and freshness.
Focusing on how the texture of baked kale chips can mimic the satisfying crunch of potato chips, but with a healthful twist, making it a guilt-free snack that feels indulgent.
The story behind this recipe
- I stumbled upon baked kale chips during a desperate attempt to find a snack that wasn’t just another bag of greasy chips. One day, I left kale on the countertop longer than I should have, and the edges started to curl and crisp up in a way that looked way more appealing than raw. That accidental crunch became the spark for this recipe, and now I keep a batch in the oven whenever I need a quick, healthy bite.
- There’s something about watching kale transform from lush, bumpy leaves to brittle, crackly chips that feels almost magical. It’s a reminder that simple ingredients, with a little heat and patience, can turn into something unexpectedly satisfying. I love how this snack always feels like a small victory—easy, honest, and downright addictive.
- story_type
Key ingredients and tips
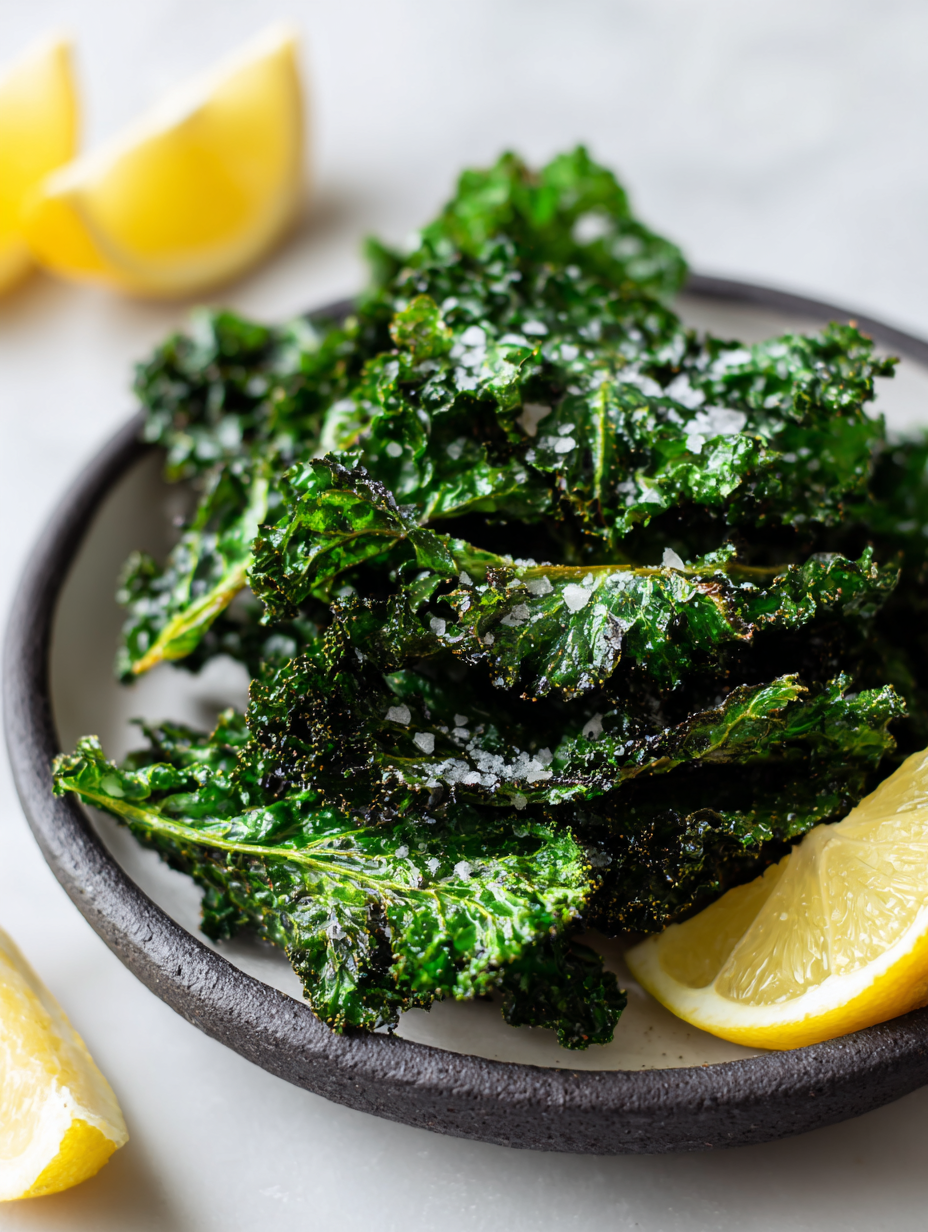
- Kale: I love how deeply green and fresh kale looks before baking, it’s a stark contrast to the crispy final. For more flavor, try massaging in a little lemon juice before baking—brings out a bright, zingy note.
- Olive Oil: A light drizzle of good extra virgin olive oil helps everything crisp up evenly and adds a subtle fruity aroma. If you want a slightly nuttier flavor, a touch of walnut oil works well, but keep the quantity minimal to avoid greasiness.
- Salt: Just a pinch of flaky sea salt enhances the earthy bitterness of kale without overpowering. For a smoky twist, sprinkle smoked paprika along with the salt before baking—adds a warm, cozy aroma.
- Spices (optional): I sometimes toss in a pinch of nutritional yeast or cumin for extra depth. Keep it light—these can easily overpower the delicate crunch if overused. Use your nose to judge the balance.
- Baking Sheet: I prefer a rimmed sheet lined with parchment to prevent sticking and ensure even crisping. A non-stick can be tempting but might trap moisture; parchment is your friend here.
- Oven Temperature: I bake at 180°C (350°F). If your oven runs hot, keep an eye on the kale—browning too fast? Turn the sheet or lower the temp slightly to avoid burnt edges.
- Cooking Time: Usually 10-15 minutes. Watch for that crackling sound and vibrant, dry-looking edges. If it’s still damp or floppy, give it a few more minutes, but don’t let it burn!
Spotlight on key ingredients
Kale:
- I love how deeply green and fresh kale looks before baking, it’s a stark contrast to the crispy final. For more flavor, try massaging in a little lemon juice before baking—brings out a bright, zingy note.
- Olive Oil: A light drizzle of good extra virgin olive oil helps everything crisp up evenly and adds a subtle fruity aroma. If you want a slightly nuttier flavor, a touch of walnut oil works well, but keep the quantity minimal to avoid greasiness.
Salt & Spices:
- Salt: Just a pinch of flaky sea salt enhances the earthy bitterness of kale without overpowering. For a smoky twist, sprinkle smoked paprika along with the salt before baking—adds a warm, cozy aroma.
- Spices (optional): I sometimes toss in a pinch of nutritional yeast or cumin for extra depth. Keep it light—these can easily overpower the delicate crunch if overused. Use your nose to judge the balance.
Notes for ingredient swaps
- Dairy-Free: Olive oil works perfectly, but if you prefer a nutty flavor, try toasted sesame oil—just a tiny drizzle adds depth.
- Salt: Sea salt is classic, but for a smoky touch, smoked sea salt elevates the flavor profile without changing the texture.
- Spices: Nutritional yeast adds cheesy umami; cumin gives a warm, earthy note. Use sparingly to avoid overpowering the kale.
- Oil: Avocado oil is a good substitute—mild flavor and high smoke point, but use a little less since it’s richer.
- Kale: Spinach or Swiss chard can be used in a pinch, but they won’t crisp up quite the same; expect more of a wilted snack.
- Additional Flavor: A squeeze of lemon juice before baking can brighten the final chips and add a zingy contrast.
- Sweet Twist: A light sprinkle of cinnamon-sugar after baking can turn kale into a surprisingly sweet snack.
Equipment & Tools
- Rimmed baking sheet: Provides a stable base for baking and prevents juices from spilling.
- Parchment paper: Ensures easy removal and prevents sticking, promoting even crisping.
- Mixing bowl: Coats the kale evenly with oil and seasonings.
- Small brush or spoon: Distributes oil evenly without overusing.
Step-by-step to crispy kale chips
- Gather your equipment: a rimmed baking sheet, parchment paper, mixing bowl, and a small brush or spoon for oil.
- Preheat your oven to 180°C (350°F). Line the baking sheet with parchment for even crisping and easy cleanup.
- Wash the kale thoroughly, then dry it completely—any moisture will hinder crisping. Tear leaves into bite-sized pieces, avoiding thick stems.
- In a mixing bowl, toss the kale with a light drizzle (about 1-2 teaspoons) of olive oil. Use your hands or a brush to coat evenly, paying special attention to each leaf.
- Sprinkle with flaky sea salt and optional spices like smoked paprika or nutritional yeast. Toss again to distribute evenly.
- Arrange the kale in a single layer on the prepared baking sheet. Spread out to avoid overlapping for maximum crispness.
- Bake in the oven for 10-15 minutes. During the first 5 minutes, listen for crackling sounds—this is a good sign. Check after 10 minutes; edges should be golden and crispy.
- If some pieces are browning too fast or burning, rotate the sheet or lower the oven temperature slightly. If they’re still damp, bake a few more minutes, watching closely.
- Once crispy and dry-looking, remove from oven. Let sit on the sheet for 2 minutes to firm up, then transfer to a wire rack if needed.
- Finish with a quick sprinkle of sea salt or spices while still warm. Serve immediately for maximum crunch.
Let the chips cool on the sheet for 2 minutes to finish crisping, then serve immediately or store in an airtight container for later.
How to Know It’s Done
- Edges are golden and crisp, not burnt or soggy.
- Crackling sound during baking indicates proper drying.
- Kale is dry and brittle to the touch, not limp or damp.
Baked Kale Chips
Ingredients
Equipment
Method
- Preheat your oven to 180°C (350°F) and line a rimmed baking sheet with parchment paper.
- Tear the kale leaves into bite-sized pieces, avoiding the thick stems, and spread them out on a clean towel to dry thoroughly—any moisture will prevent crisping.
- Transfer the dried kale to a mixing bowl and drizzle with about 1 teaspoon of olive oil. Use your hands or a small brush to gently toss and coat each leaf evenly, ensuring no piece is overly greasy.
- Sprinkle a pinch of flaky sea salt and, if you like, smoked paprika over the kale. Toss again to distribute the seasonings evenly across all the leaves.
- Arrange the seasoned kale leaves in a single layer on the prepared baking sheet, spreading them out so they don’t overlap—this helps them crisp uniformly.
- Bake the kale in the preheated oven for 10 to 15 minutes. Keep an ear out for crackling sounds, and watch for the edges to turn a vibrant golden-green with a slight smoky hue.
- At the 10-minute mark, check the chips for crispness—if they’re still a bit floppy, give them a few more minutes, checking frequently to prevent burning.
- Once crispy and dry-looking, remove the baking sheet from the oven and let the chips sit for about 2 minutes—this final resting time helps them finish crisping up.
- Transfer the kale chips to a serving bowl or enjoy straight from the sheet. Serve immediately for the best crunch and smoky aroma.
Tips for perfect kale chips
- Even layer: Spread kale in a single layer on the baking sheet to ensure even crisping and prevent overlapping.
- Light oil: Use just enough oil to coat; too much creates greasy chips and hinders crunching.
- Temperature check: Bake at 180°C (350°F) and start checking around 10 minutes for perfect golden edges.
- Listen for crackle: The sizzling sound indicates moisture is evaporating—crispness is near.
- Rotate sheet: If some pieces brown faster, rotate the pan halfway through baking for uniform crunch.
- Cooling time: Let chips rest 2 minutes on the sheet after baking to finish crisping before serving.
- Avoid moisture: Ensure kale is completely dry before tossing with oil to prevent soggy chips.
Common mistakes and how to fix them
- FORGOT to dry kale thoroughly → Use a towel to eliminate moisture for crispier chips.
- DUMPED too much oil → Keep oil light; excess makes chips greasy and less crunchy.
- OVER-TORCHED at 15 minutes → Check early; kale can burn quickly once edges brown.
- MISSED the cooling step → Rest chips 2 minutes on sheet to finish crisping before serving.
Quick fixes and pantry swaps
- If kale feels damp, splash with lemon juice to boost crispiness and add brightness.
- When chips are over-browned, patch with a sprinkle of sea salt to balance the smoky flavor.
- Splash a little water if kale burns quickly—reduce oven temperature and bake slowly.
- Shield fragile chips with a piece of parchment if they crackle loudly and seem burned.
- When in doubt, swap kale for spinach or chard—they crisp up quickly and still satisfy that crunch craving.
Prep, store, and reheat tips
- Pre-wash and thoroughly dry kale leaves ahead of time—this helps prevent soggy chips later.
- Store unbaked kale in an airtight container in the fridge for up to 24 hours; it stays fresh and crisp.
- Baked kale chips are best enjoyed within 2-3 days; store in an airtight container at room temperature for optimal crunch.
- Reheat briefly in a 150°C (300°F) oven for 2-3 minutes if chips lose some crispness; listen for crackling sounds to gauge readiness.
- Avoid refrigerating baked chips long-term as moisture can make them limp and dull their crunch.
Top Questions About Baked Kale Chips
1. What do baked kale chips taste like?
Baked kale chips are crispy, slightly smoky, and have a delicate crunch that mimics potato chips but with a fresh, earthy taste. They’re light, airy, and satisfy that craving for something crunchy.
2. What does the baking smell like?
They smell slightly smoky and earthy while baking, with a hint of salt and spices. Once done, the aroma is warm and inviting, with a satisfying crackle when you bite in.
3. How do I prepare the kale properly?
Use fresh, dry kale leaves, ideally organic. Wash and thoroughly dry them before tossing with a little oil—moisture is the enemy of crispness.
4. How long should I bake kale chips?
Bake at 180°C (350°F) for 10-15 minutes. Keep an ear out for crackling sounds—this means the moisture is evaporating and they’re getting crispy.
5. My kale chips aren’t crispy enough, what do I do?
If they’re not crispy enough, bake for a few more minutes, checking frequently to prevent burning. If they burn, reduce oven temp slightly or rotate the sheet.
6. Can I customize the flavor?
Yes! You can add spices like smoked paprika, nutritional yeast, or cumin before baking. Just use sparingly to keep the delicate crunch intact.
7. How should I store leftover kale chips?
Store baked kale chips in an airtight container at room temperature for up to 3 days. For best crunch, enjoy them fresh and avoid refrigeration, which can make them limp.
8. How do I revive stale kale chips?
If they become less crunchy, reheat briefly in a 150°C (300°F) oven for 2-3 minutes until they crackle again. Always check for signs of burning during reheating.
9. What if my kale chips burn or get soggy?
When kale feels damp or soggy, sprinkle a little lemon juice or increase oven heat slightly. For burnt edges, peel away the char and bake a minute or two longer for even crispness.
10. Can I use other greens besides kale?
Absolutely. You can swap kale for spinach or Swiss chard, but they may not get as crispy and tend to be more delicate; watch them closely.
These baked kale chips are more than just a snack; they’re a little act of rebellion against processed junk. Each crispy leaf carries a fresh, earthy flavor that’s surprisingly satisfying and feels good to eat. When the craving hits, they’re quick to whip up, making healthy choices feel effortless.
In the end, it’s all about that crispy crunch, the smell of toasted greens, and knowing you’ve turned simple ingredients into something genuinely delicious and nourishing. Plus, you get to enjoy the satisfaction of a snack that’s as honest as it is crunchy, right out of your own kitchen.