Roasted chickpeas are one of those snacks I keep coming back to, especially when I want something crunchy but not greasy. There’s something about how roasting enhances their nutty flavor and transforms their texture into a satisfyingly crisp bite that’s hard to beat. It’s simple, honest work—just a bit of oil, seasoning, and patience, and you get this golden, crackling snack that’s perfect for munching straight from the oven.
What I love most is how versatile they are. You can go savory with smoked paprika or chili powder, or keep it light with lemon and herbs. Once you get the hang of roasting them right, they become a staple in my kitchen—easy to prep ahead and endlessly customizable. Plus, they’re a good way to use up those cans of chickpeas that tend to sit in the back of the pantry, forgotten until I need a quick snack.
Focusing on how roasting chickpeas transforms their texture, making them irresistibly crispy and nutty, perfect for a satisfying snack that satisfies the craving for crunch without deep-frying.
The story behind this recipe
- I first started making roasted chickpeas during a messy weekend retreat. I was craving something crunchy and satisfying, but didn’t want greasy chips. The smell of roasting spices and toasted chickpeas filled the tiny kitchen, and I was hooked.
- That batch became a staple for late-night snacks and packed lunches. Over time, I tweaked the seasoning and experimented with different textures, realizing how roasting really amplifies their nutty flavor and crispy bite.
- It’s one of those recipes that feels honest and unpolished—just good ingredients, a bit of heat, and a little patience. Turns out, the simplest snacks are often the most addictive.
Key ingredients and their secrets
- Canned chickpeas: I always rinse them well—removes that tinny flavor and helps them crisp up better. You can try dried and cooked, but the canned are quick and reliable.
- Olive oil: A light coating is key—just enough to help seasonings stick and promote crispiness. Too much, and they turn greasy; too little, and they might stick or burn.
- Sea salt: I like a generous sprinkle—brings out their nutty flavor and balances the seasoning. Adjust to your taste, but don’t skimp entirely.
- Paprika or chili powder: I love the smoky depth these add—use sweet or smoked paprika for a richer flavor. For a spicy kick, bump up the chili, just watch for burning if too much.
- Garlic powder: It’s my secret weapon—adds depth without moisture. Fresh garlic can burn easily, so I prefer powder for even roasting.
- Lemon zest or herbs: For a fresh, bright finish—add after roasting. It keeps the flavors lively and prevents burning during the bake.
- Optional extras: Cumin, curry powder, or nutritional yeast—these transform simple chickpeas into a flavor-packed snack. Play around to find your favorite combo.
Spotlight on key ingredients
Canned chickpeas:
- I rinse them well—removes that tinny flavor and helps crisp them up better. Dried chickpeas work too but need soaking and longer roasting time.
- Olive oil: A light coating is essential—just enough to help seasonings stick and promote crispiness. Too much makes them greasy, too little they stick or burn.
- Sea salt: I like a generous sprinkle—brings out their nutty flavor and balances the seasoning. Adjust to your taste, but don’t skimp on salt for maximum flavor.
Seasonings and flavorings:
- Paprika or chili powder: I love the smoky depth these add—use smoked or sweet paprika depending on your mood. For a spicy kick, increase chili, but watch for burning near the end.
- Lemon zest or herbs: For a bright, fresh finish—add right after roasting. Keeps flavors lively and prevents burning during baking.
- Optional extras: Cumin, nutritional yeast, curry powder—these transform simple chickpeas into a flavor-packed snack. Mix and match for your favorite twist.
Notes for ingredient swaps
- Dried Chickpeas: I prefer dried for a more controlled texture, but canned are so much quicker and convenient—just rinse well to remove that tinny flavor.
- Olive Oil: Use avocado or grapeseed oil if you want a neutral flavor and high smoke point—both help achieve that crisp exterior without lingering greasiness.
- Sea Salt: Kosher salt flakes give a nice crunch and clean saltiness, but table salt works fine—just adjust the quantity to avoid over-salting.
- Paprika or Chili Powder: Smoked paprika adds a deep, smoky aroma, while sweet paprika keeps it mild. For heat, bump up the chili powder—just watch for burning near the end.
- Lemon Zest or Herbs: Fresh lemon zest brightens the flavor after roasting, or sprinkle chopped herbs like parsley or cilantro for freshness—add these after baking to keep their vibrant aroma.
- Additional Seasonings: Cumin, curry powder, or nutritional yeast can amp up the flavor—try each in small amounts to find your favorite twist.
- Optional Spices: Cayenne or smoked chipotle can add a fiery or smoky kick—start with a pinch, as they can quickly overpower the chickpeas.
Equipment & Tools
- Baking sheet: To hold and roast the chickpeas evenly.
- Parchment paper: Prevent sticking and make cleanup easier.
- Mixing bowl: Tossing chickpeas with oil and seasonings.
- Kitchen towel: Drying chickpeas thoroughly for crispiness.
Guide to perfectly roasted chickpeas
- Preheat your oven to 200°C (400°F). Grab a baking sheet and line it with parchment paper to prevent sticking.
- Drain and rinse one can of chickpeas thoroughly under cold water. Pat dry with a clean towel until as dry as possible—this helps them crisp up.
- In a mixing bowl, toss the chickpeas with 1-2 tablespoons of olive oil until evenly coated. Add a pinch of salt and your chosen seasonings—paprika, chili powder, garlic powder—about 1 teaspoon each to start.
- Spread the chickpeas in a single layer on the prepared baking sheet. Make sure they’re not crowded—space helps them crisp evenly.
- Bake for 25-30 minutes, shaking the pan halfway through. Watch for a golden color and listen for a crackling sound—those are signs they’re getting crispy.
- Check for doneness: they should be deeply golden, slightly shriveled, and make a crunch when you bite. If not quite there, pop back in for 5 more minutes, but keep an eye so they don’t burn.
- Remove from oven and let sit for 5 minutes on the sheet. They’ll continue to crisp as they cool. For extra flavor, toss with lemon zest or fresh herbs right after baking.
- Serve warm or at room temperature. Store leftovers in an airtight container for up to 3 days—reheat in a 180°C (350°F) oven for 5 minutes until crispy again.
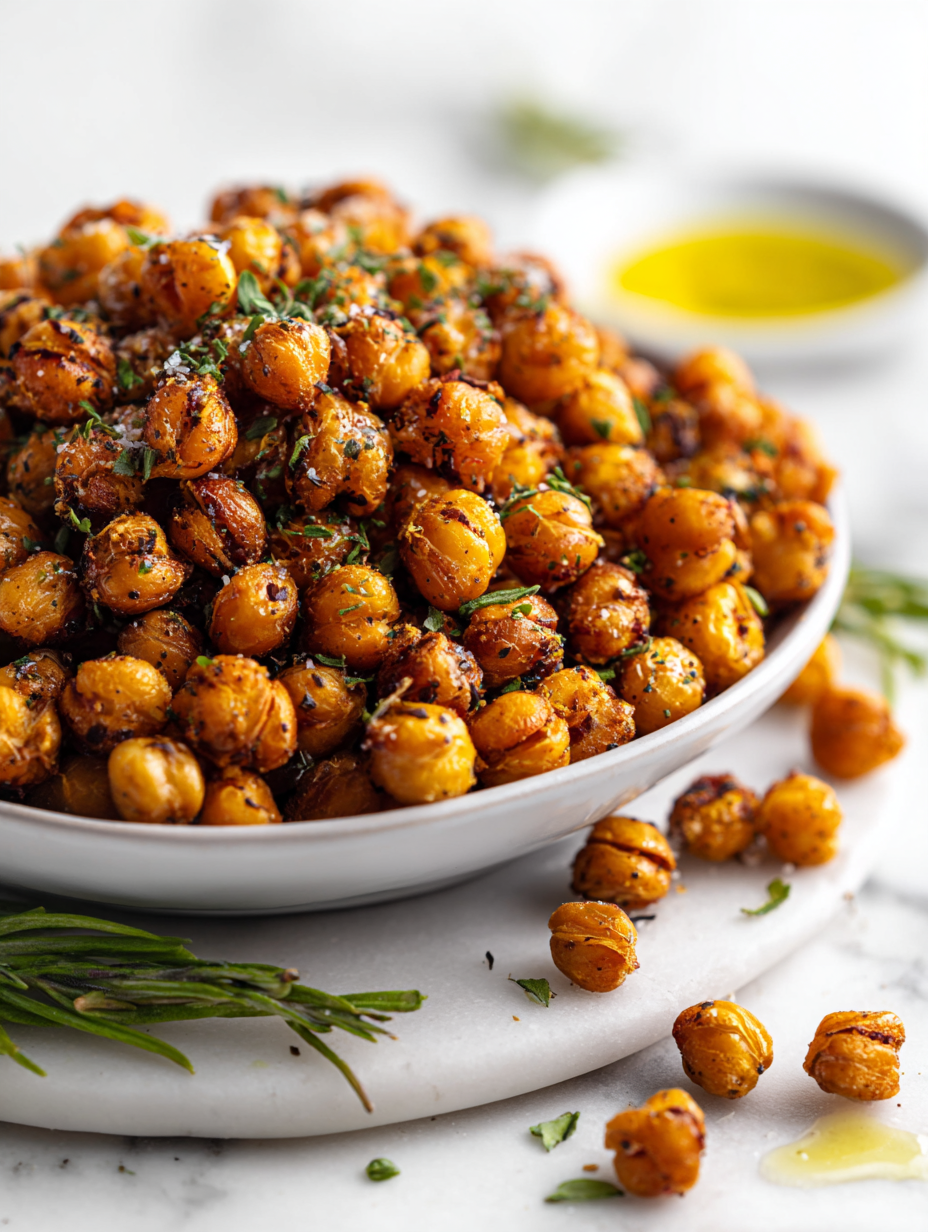
Allow the chickpeas to cool slightly on the baking sheet to firm up. Toss with fresh herbs or lemon zest if desired. Serve in a bowl or jar, perfect for snacking or topping salads.
How to Know It’s Done
- Color: deep golden brown, not pale or burnt.
- Texture: crunchy outside with a slight resistance when bitten.
- Sound: crackling when you shake the baking sheet during roasting.
Crispy Roasted Chickpeas
Ingredients
Equipment
Method
- Preheat your oven to 200°C (400°F) and line a baking sheet with parchment paper.
- Drain and rinse the chickpeas thoroughly under cold water, then spread them out on a clean kitchen towel to dry completely—pat them dry with another towel if needed, until they feel dry to the touch.
- Transfer the dried chickpeas to a mixing bowl, then toss them with the olive oil until evenly coated—this helps the seasonings stick and promotes crispiness.
- Sprinkle the salt, paprika or chili powder, and garlic powder over the chickpeas, then toss again to distribute the spices evenly across each one.
- Spread the seasoned chickpeas out in a single layer on the prepared baking sheet, making sure they aren’t crowded—this ensures even roasting and crisping.
- Place the baking sheet in the oven and roast for 25-30 minutes, shaking the pan every 10 minutes so they brown evenly and develop a crackling sound as they crisp up.
- Check for doneness: the chickpeas should be deeply golden, shriveled slightly, and sound crunchy when shaken—their aroma will be nutty and inviting.
- Remove the chickpeas from the oven and immediately toss with the lemon zest, spreading them out to cool slightly—this adds a fresh brightness and prevents burning during cooling.
- Let the chickpeas cool for about 5 minutes on the baking sheet—they will become even crunchier as they sit.
- Transfer the cooled chickpeas to a bowl and serve immediately, or store in an airtight container for up to 3 days for a crunchy snack anytime.
Pro tips for crispy roasted chickpeas
- Bolded mini-head: Use a light oil coating—helps chickpeas crisp without turning greasy.
- Bolded mini-head: Dry chickpeas thoroughly—removes excess moisture, ensuring maximum crunch.
- Bolded mini-head: Shake the pan halfway—promotes even roasting and prevents burning on one side.
- Bolded mini-head: Watch for color—deep golden brown signals perfect crispiness, not burnt edges.
- Bolded mini-head: Add herbs after roasting—preserves vibrant aroma and prevents burning during baking.
- Bolded mini-head: Roast in a hot oven—around 200°C (400°F) for a crispy, crackling texture.
- Bolded mini-head: Cool before storing—allows chickpeas to firm up and prevents sogginess in storage.
Common mistakes and how to fix them
- FORGOT to dry chickpeas thoroughly—causes sogginess; fix by patting dry with a towel.
- DUMPED oil directly on chickpeas—leads to uneven coating; toss with a spoon for even coverage.
- OVER-TORCHED the chickpeas—burns flavor; remove early if they smell smoky or look too dark.
- MISSED shaking the pan—causes uneven crispiness; shake every 10 minutes for uniform texture.
Quick fixes and pantry swaps
- When chickpeas seem soggy, splash them with a quick spray of oil and roast 5 more minutes.
- If you forgot to dry the chickpeas thoroughly, pat them down with a towel before roasting.
- Over-torched chickpeas? Remove early and toss with fresh herbs to mask slight burn notes.
- Dumped too much oil? Patch with a sprinkle of seasoning and bake on a lower rack for even crispness.
- When chickpeas stick or burn, shield with a sheet of foil and lower the oven temperature slightly.
Prep, store, and reheat tips
- Prepping the chickpeas—rinsed and thoroughly dried—can be done a day ahead; keeps them crispy and ready to roast.
- Store cooked or roasted chickpeas in an airtight container in the fridge for up to 3 days. They stay crunchy but may lose some aroma.
- Reheat in a 180°C (350°F) oven for 5-7 minutes until they shimmer with a slight crackle, restoring much of their original crispness.
- For longer storage, freeze roasted chickpeas in a sealed bag for up to 2 weeks. Expect a slight loss of crunch when thawed and reheated.
- Note that flavors can mellow over time in the fridge; adding a sprinkle of fresh herbs or lemon zest after reheating can revive their brightness.
Top questions about roasted chickpeas
1. Should I rinse canned chickpeas before roasting?
Rinsing canned chickpeas removes that tinny flavor and helps them crisp up better during roasting.
2. Do I need to dry chickpeas before roasting?
Yes, drying them thoroughly with a towel ensures they become crispy rather than soggy from excess moisture.
3. How much oil should I use for roasting?
Using too much oil can make chickpeas greasy; a light coating is enough to help seasonings stick and promote crispiness.
4. When should I add herbs or lemon zest?
Adjust seasoning after roasting to prevent herbs and lemon zest from burning and losing their bright aroma.
5. What oven temperature is best for roasting chickpeas?
Bake at 200°C (400°F) until golden and crackling, usually 25-30 minutes, shaking halfway for even crispness.
6. How do I know when the chickpeas are perfectly roasted?
Look for a deep golden color, crunchy texture, and a crackling sound when shaking the pan to know they’re done.
7. How should I store roasted chickpeas?
Store leftovers in an airtight container in the fridge for up to 3 days; reheat in a hot oven for best crispness.
8. Can I freeze roasted chickpeas?
You can freeze roasted chickpeas for up to 2 weeks, but they may lose some crunch when thawed and reheated.
9. What if my chickpeas turn out soggy?
Soggy chickpeas? Toss them with a little extra oil and roast for 5 more minutes to restore crunch.
10. How do I fix burnt roasted chickpeas?
If chickpeas burn, remove early and shield with foil; lower oven temp slightly and continue roasting.
Roasted chickpeas are a little bag of honest crunch, built on simple ingredients and a bit of patience. They remind me of lazy weekends, the smell of spices filling the kitchen, and that satisfying crackle when you bite into them. Sometimes the best snacks are the easiest, and this one keeps me coming back for more, no matter the season or mood.
In the end, it’s about the small moments—cracking open a jar of crispy chickpeas, sharing them with friends, or just munching them straight from the oven. They’re humble but endlessly customizable, a reminder that good things often come from straightforward work. And honestly, that’s what makes them so memorable.